

Boat Building Forum
Find advice on all aspects of building your own kayak, canoe or any lightweight boats

Hi Mark,
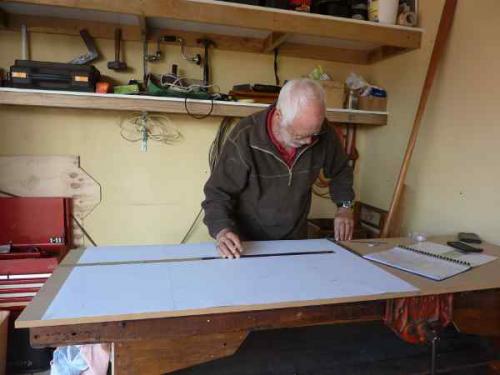
Not claiming this is the only way but here is how I did it for my Yost Sea Cruiser. Get a sheet of so-called "poster paper" from a craft or drawing materials shop. Tape it to a sheet of plywood probably the sheet which will ultimately be jig-sawed up for the actual Yost frames. [In my case I used the sheet of MDF board destined to be hacked up for the cockpit coaming pattern.]
With a good and true setsquare and a 600mm (2' long ) steel ruler draw a vertical centreline and mark then mark a point 25mm (1") up from the edge of the paper/plywood edge to be the Zero Base for Tom Yost's Height Above Keel (vertical) Offsets. [It is hard to see on this reduced image but there is a vertical line drawn of the paper about 300mm (12") to the left of the lofter's left hand.]
Then measure up from the Zero Base and mark the Section2 KEEL HAB from Tom's Table Of Offsets onto the Section 2 centreline.
Measure up from the Zero Base point and mark out wide on right and left, the Chine HAB from Tom's Table of Offsets; draw a pencil line across between the 2 Chine HAB heights marked; then measure out from the Section 2 centreline the Half Breadth for Section 2 and mark the actual Chine Offset points (out left and right) on the horizontal line you just drew.
Repeat process for Gunwale and Deck Ridge Offsets.
Pencil in the lines between Offset Points.
Then draw in the sizes of your actual chine and keel stringer timbers with the "corners" of the timbers in the correct position as per the pic .
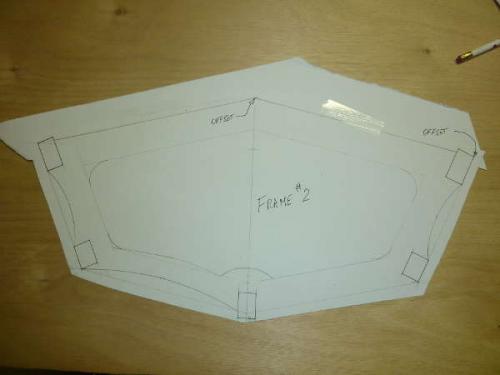
Repeat the process for the other Sections (or Frames); cut out the poster paper shapes with some spare paper around the edges. When you have the whole set of Frames, juggle them around your plywood sheet for optimum use of your expensive marine plywood. When satisfied, tape down the poster paper shapes and punch the offset points with a small nail and re-draw the pencil lines on the plywood joining up the nail indentations.
WARNING : do not leave the poster paper shapes overnight before transferring the Offset Points to the plywood - the paper will probably change shape overnight due to humidity changes and you will have to re-measure and re-plot directly onto the plywood again - once bitten, twice shy !
Then following Tom's excellent on-line procedures, construct/draw the curved lines for the outer edges of the frames which allow for inward bowing of the final skin; also draw the internal cut-out lines for the frames.
If you have any physical handicap like very long legs, knees which do not work well or, in my case, 2 synthetic hips you might have to adjust the internal cut-out shapes to suit and thus the shape of the top (deck) line of the frame(s) immediately ahead of the cockpit. [If this is a problem for you then PM and I can show you some more detail on resolving this problem.]
Good luck with your build.
Martin B.
Mandurah, Western Australia
Messages In This Thread
- Skin-on-Frame: understanding offset measurements
Mark Vander Horck -- 12/10/2013, 2:26 pm- Re: Skin-on-Frame: understanding offset measuremen
Malcolm Schweizer -- 12/10/2013, 7:06 pm- Re: Skin-on-Frame: understanding offset measuremen *PIC*
Martin Bunny -- 12/10/2013, 10:30 pm- Re: Skin-on-Frame: understanding offset measuremen
Mark Vander Horck -- 12/11/2013, 3:22 pm
- Re: Skin-on-Frame: understanding offset measuremen
- Re: Skin-on-Frame: understanding offset measuremen *PIC*
- Re: Skin-on-Frame: understanding offset measuremen
